Do It Yourself: Screened In Porches
Do It Yourself: Screened In Porches
Birds singing in the trees, a warm breeze rustling their bright green leaves, the distant sound of a lawnmower and the smell of fresh cut grass: These are your surroundings as you relax on your covered and screened porch. Oh? You don’t have one, yet? Well let’s build one.
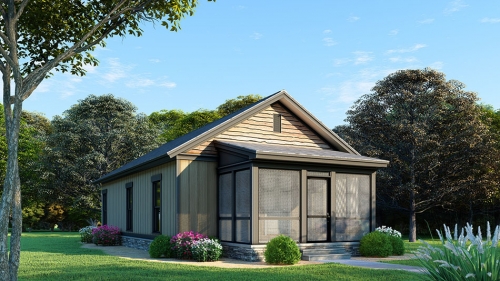
Featured plan above is our Rivers Edge (MEN 5044) plan. This plan features a prominent screened in front porch giving you a lovely space to relax and unwind.
Increases Home Value
Building a screened in porch is hard work, but it is totally worth it. A screened porch is something that will increase the value and resale value of your home. It’s not so much the dollar and cents increase as it is the aesthetic increase. Home owners enjoy having an outdoor living space, especially one where you don’t have to worry about insects.
And if the screened in porch is built with durable materials, it will last for a very long time. I’ve seen homes that were built in the early 1900’s around here that still have their original screened in porches and they are still just as nice looking and functional. If you build the porch with quality materials it will be something your family will enjoy for many years to come.

Increases Living Area
Having a screened in porch will you give you extra space for entertaining or just relaxing. Even if it’s just a small porch it will still add valuable square footage to your home. I know that my kids love to go outside on sunny days and that a screened in porch will give them extra room to move and play. It would also give me a place to watch them from without having to be eaten alive by mosquitos.
That is a major consideration here in the south. We have a mosquito problem. You might even say it’s a mosquito epidemic. We hide from the little buggers and go to great lengths to keep them out of our homes. A screened in porch gives you a bit of padding between your main entryway and those bugs. It also gives you a place to sit and relax where they can’t get to you.
Easy Maintenance
A screened porch is easy to maintain once it is built. You might have to replace the screens on it every 10 years or so and repaint it, but that is basically all you will ever have to do. Once you have the porch built, just make sure that the roof doesn’t leak and that no one pierces the screening and you should have an addition on your home to last you for years and years to come.

Versatile Through the Seasons
A screened in porch is not just for the spring and summer. It makes a great mudroom for the mucky days of winter and fall. We talked about mudrooms in a previous blog and how wonderful they are. I would love to have a place for my husband to take off his nasty work boots before he treks across my nice carpet. A screened in porch could give you an alternative place to store those types of things. It would also be great to help with unloading the groceries.

Building Your Own Screened In Porch
If you have ever done any sort of building yourself, don’t worry you’ve got this. The basic building techniques don’t change no matter what the project is. You’re going to need to know how to use a measuring tape, a level, a saw, a drill and a hammer. Everything else is just a combination of those skills. There are tons of how-to websites online that can walk you through just about any project. I went through and simplified a few to use in this post. This post is not a how-to article, but just for general information.
Here are a few of the articles that I found while I was looking for information:
- Extreme How To
- DIY Network
- Patio Enclosures
- Family Handiman - Screened Porch
- Black And Decker
- Family Handiman - Screened Patio
The first thing you need to take into consideration is where you are going to put in your screened porch. The project I have in mind for my home is actually the easiest one of the group. We have a small porch in the front of our home that leads into the front door. It’s already built and is covered. Basically all we would have to do is build a frame for the screen and hang the screen and the door.
Your project may be completely different. Every home is unique. Before you do anything, make sure to call your local utility companies to make sure the area that you want to put your screened porch is in a good place. Also, be sure to check the local building codes. We don’t want you to build anything without a permit if you need one or something that is not up to local codes.
Think about where you want to put your screened porch. Do you have a patio that you want to cover? Do you have a deck already built that you feel like would be better screened in and covered? Or are you looking at a bare bit of dirt that needs some TLC?
If you already have a deck on your home that you are modifying, you can skip this section and go straight to the section about putting in side walls.
Every screened porch needs a floor. And there are two basic options for the floor of a screened in porch: 1) patio or concrete pad, and 2) wood decking. If you are building on a patio or concrete pad, you’ll need to put in posts to support the structure of the screened in porch. To do that, you’ll need to either dig in the area past the patio or dig through the area of the patio. Either way you’ll have to set the posts with either footings or concrete around the base of them.
If you are going to install decking to be the floor of your screened in porch, then you are going to need to bury posts as well. These are going to have to be sturdy and be able to hold up the entire structure of your screened in porch. Make sure they are level and that you have them spaced equally and no more than a couple feet apart.
If you don’t have that lovely patio or concrete pad to take the place of a floor, you are going to need to install Ledgers. Ledgers are long wide boards that are attached to the structure of the home that will give support to the newly built structure. You’ll want to remove the siding from the side of your home and measure so that the ledger board sits between 6 and 8 inches below your doorway. You’ll need to install flashing and take precautions so that rain and snow do not get caught and cause rot and other nasty things to happen.
Once you have the ledger board in place against your home, you are going to run additional ledger boards to support the weight of the structure. If you don’t have to have a ledger board against your home, you are going to run lighter lumber in the same way. You’ll anchor these boards to the concrete or to the support posts. You want good, flat, straight boards to run the perimeter of where you are building.
 To Deck or Not To Deck
If you have a patio or a concrete pad, you can skip this next section. If you are putting in a dec
